Preview Window
Your image will download and appear exactly as it appears on the canvass. Once downloaded, you can then upload the image to the appropriate location within your OPS Community Interface Editor.
1. Upload Images: Click "Upload Images" to upload images, or "Upload Layers File" to upload a previously saved layers file.
2. Select Template: Choose "Main Page Hero" (1900x650), "Inner Page Header" (1200x300), or "Preview Image" (300x300).
3. Background Color: Pick a color for the canvas background.
4. Add Text (Inner Page Header): Enter Agency Name and Page Title, adjust size, weight, line height, color, and drag to position.
5. Add Shapes: Use "SHAPE TOOLS" to add rectangles, circles, or triangles. Adjust their color, width, height (up to 1000px), rotation, and drag to position.
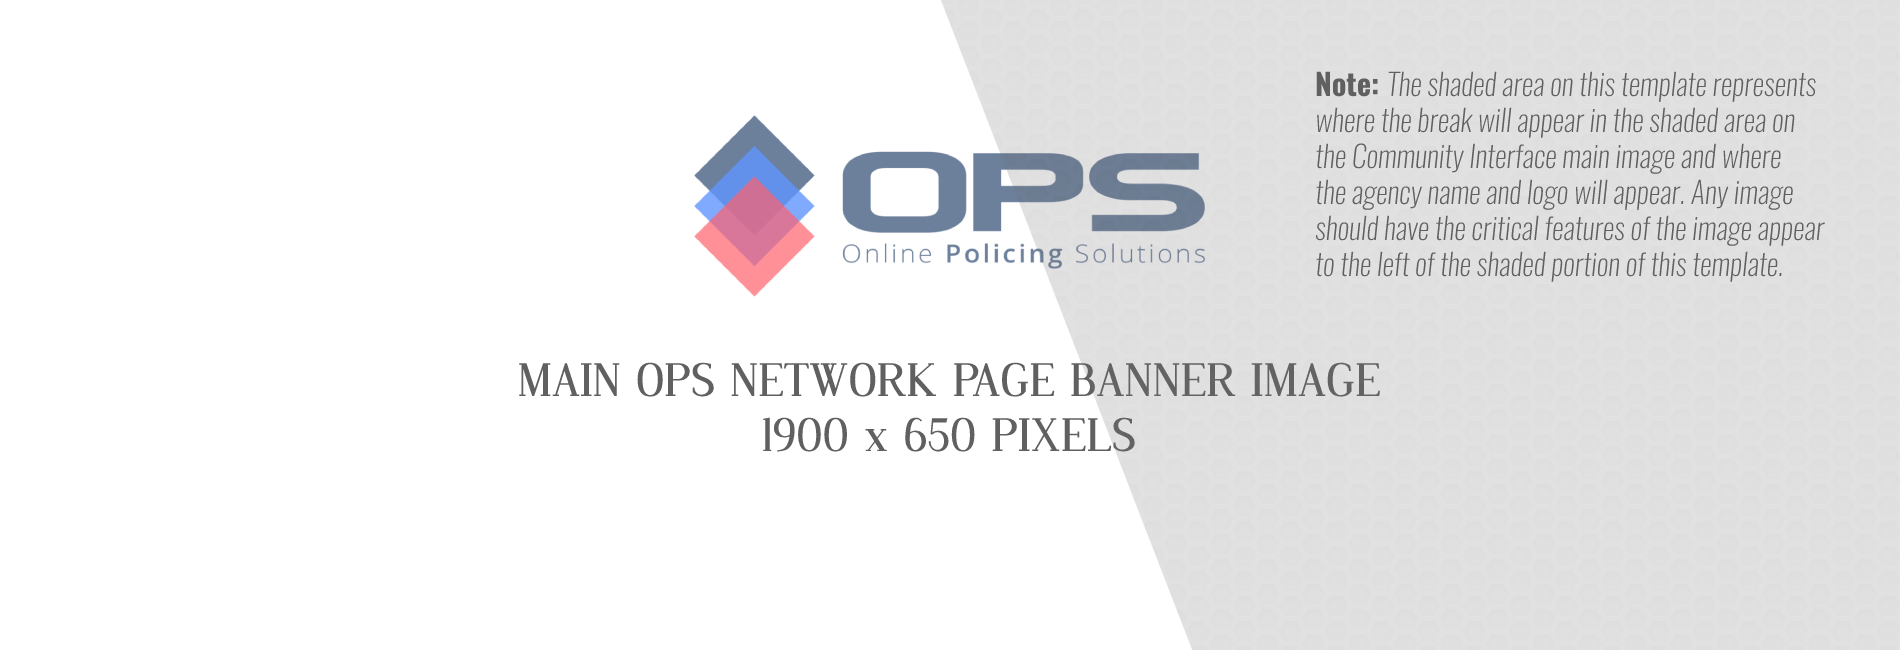
6. Main Page Hero Guide: When using "Main Page Hero," click the "Click here to view a Main Hero Image Guide" button to view a guide for positioning elements.
7. Manage Layers: In the "Layers" section, click a layer (image or shape) to edit; the selected layer will be highlighted with a marker (▶). Drag to reorder or use "Move Up" and "Move Back" buttons to adjust layer order (top of list = foreground; text on top for Inner Page Header). Use "Undo" to revert the last deletion.
8. Edit Images: Use "IMAGE EDITING TOOLS" to adjust brightness, opacity, scale, delete, or drag images to move.
9. Reset Layer: Restore selected layer to defaults.
10. Reset Editor: Clear all content for a fresh template (confirms first).
11. Save Your Work: Use "Download Image" to save the image as a PNG at full resolution, or "Download Layers" to save a JSON file with all layers for later editing (you'll be prompted to name the file).
Layers
SHAPE TOOLS
IMAGE EDITING TOOLS